
Spring is here, which means it’s time for the best venison sausage recipe!
My husband makes smoked venison brats twice a year, perfect for summer grilling and cozy winter evenings.
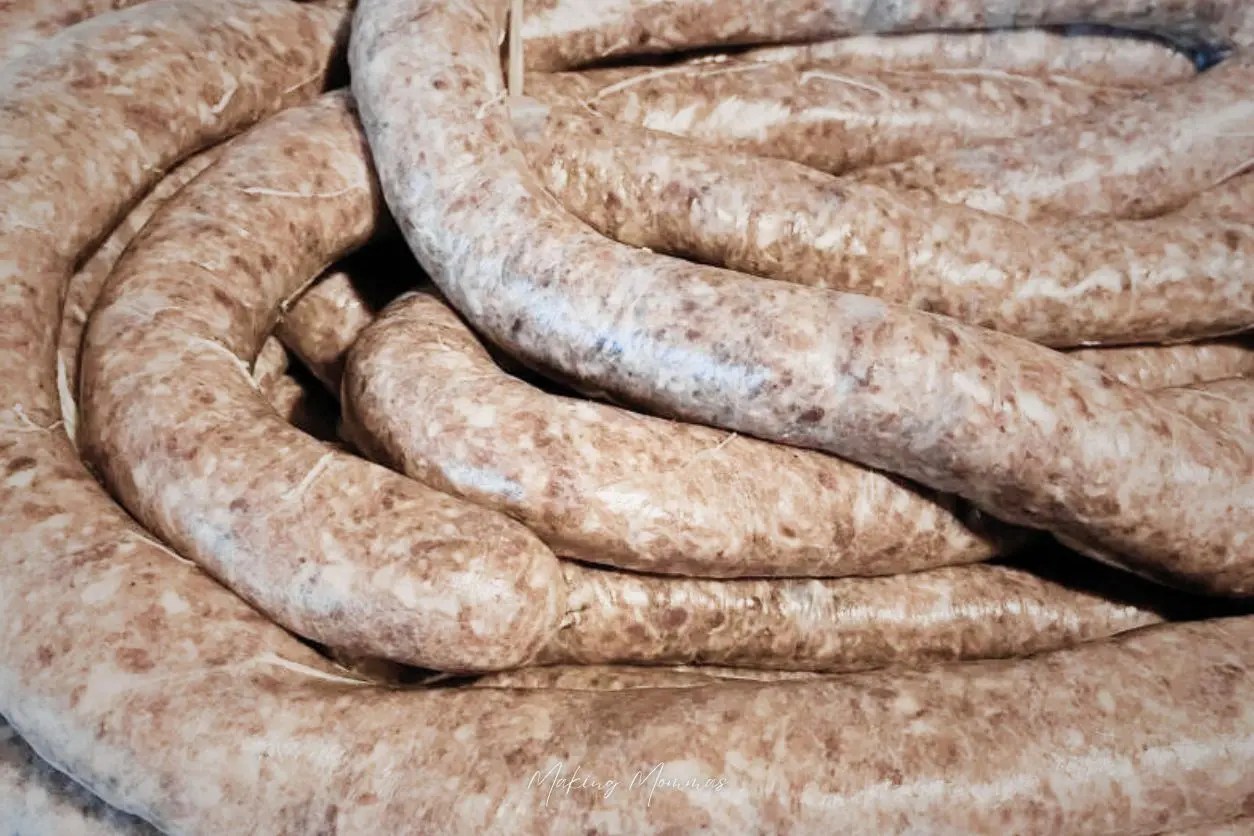
Here’s a quick guide to making your own venison deer brats: start with frozen or fresh venison, season to taste, grind, stuff, and smoke to perfection!
This post is my take, based on observation—my husband is the true master. Have questions?
Drop them in the comments below, and I’ll get you detailed answers.
Continue reading for a deeper dive into the process!

What You Need for this Venison Sausage Recipe
This post contains affiliate links, which means if you purchase something using one of our links, Making Mommas gets a very small commission. It costs you nothing extra, and helps support Making Mommas.
For more information, see my disclosure policy.
For my husband’s homemade smoked venison sausage recipe, you’ll need:
- a smoker
- a meat grinder
- a sausage stuffer
- a venison sausage kit
- sausage casings
- venison
- pork sausage
I’ll leave links at the bottom of this post for you if you need to purchase these things.
Plus, before getting started, you should know that this is a two-day process. It takes one day to stuff the sausages, and then it’s best to let them rest overnight, before smoking them. So, it’s a good weekend project.
These smoked venison sausages are deer brats. They aren’t venison breakfast sausage.
So, if you are looking for a venison breakfast sausage recipe, maybe I’ll share it the next time he makes breakfast sausage!
How to Make This Homemade Venison Sausage Recipe
My husband used to bring his meat to a meat locker for processing. But that gets pretty spendy!
And when you are on a tight budget, it is hard to find the money for it.
So, he decided to invest in the equipment and do it himself!
Now, all these years later, our boys do it with him! What a handy skill to teach your kids – and a great way to spend time together.
1. Prepare Your Meat and Casings

If your deer meat is frozen, you’ll need to thaw it in the fridge for a few days.
After your meat is thawed, rinse the excess blood off of it.
If your venison isn’t already cut into one-inch pieces, cut it now. It’ll make grinding easier.

Next, rinse the casings under cold water to remove the salt from them. Then soak them in warm water for about one hour, while you are grinding your venison.
2. Grind the Venison
After your meat has drained, run the venison through the grinder.
It looks like dog food! 😂🤣

3. Mix in the Ground Pork Sausage
Use equal part venison and equal part pork sausage, a one-to-one ratio.
Mix the ground pork sausage with the ground meat.
4. Prepare Your Venison Sausage Seasoning

My husband usually doesn’t make his own seasoning. He just buys a Polish Sausage seasoning kit.
He likes the Hi Mountain brand.

Then, follow the package directions and mix your venison sausage seasoning.
5. Mix the Venison Sausage Seasoning into the Mixture
Pour your seasoning over the ground venison mixture and then just work the seasoning in by hand.

6. Run the Seasoned Meat Mixture Through the Meat Grinder Again
After your ground venison is seasoned, run it through the meat grinder a second time. This mixes the seasoning, pork, and venison together even better, and grinds it to a finer texture.
7. Stuff Your Sausage Casings with the Meat
You know what sausage casings are, right?
Yup, that’s right – intestines! 🤢 And they look and smell just like you would expect them to.
Yet, I still eat my husband’s smoked venison sausage.
What can I say? It’s delish!
Before stuffing the casings, my husband likes to dump a can of beer into the meat mixture. If you do that, be sure to mix it in well.
And then stuff your casings with the meat!
I think there’s an art to it, so just check out the pictures and watch the videos before trying it for the first time.
And all I can say is that practice makes perfect. The more you do it, the better you’ll be.
So, first, load up your stuffer with the meat mixture and run it through, just to the point where it is at the tip of the stuffer tube. Then, gently ease the casing onto the stuffer.
Tie the end off. Be sure to pull it tight.
Then gently push the meat mixture through the stuffer and into the casing, using your hands to mold the sausage as you go along.
If you get a hole, it is okay. You can leave it if you choose to do so, but my husband recommends cutting it off and starting over.
As you near the end of the casing, slow down, remove the casing and tie a tight knot.
Continue until all your casings are stuffed, or until you run out of meat mixture.
When you are finished, let your meat rest. Overnight is best, but do not let it rest for more than 24 hours.

8. Smoke Your Venison Sausage
In the morning, load up your smoker with the venison sausage!

Lay the sausages on the screens, or hang from the racks, if you have one of those.
Your sausage needs to be dry to the touch before starting.
Smoke at 120º F for 1 hour, 160º F for 30 minutes, with the smoke “on”, and 180º F until the sausage reaches an internal temperature of 156ºF.
Leave the smoke on for up to 2 hours.

9. Freeze Your Smoked Venison Sausage

We use the Foodsaver Vacuum Sealer to freeze all our meats, fruits, and vegetables. You can find them at Walmart, or I’ll leave a link at the bottom of this post.

You can use freezer bags if you’d like, but the Foodsaver keeps your smoked venison sausage fresher for longer.
Just follow the Foodsaver directions, when sealing your smoked venison sausage.
Generally, you can freeze your smoked venison sausage for one year.
But ours never lasts that long.
10. Share with Family and Friends!

You will be so proud of yourself after you’ve smoked your own sausage!! You’ll want to share it with all your family and friends!
And they will love you for it!
And that’s it!!
It seems like it’d be really hard to make your own sausage, but it’s not. It’s just a process.
Do what my husband does – grab a beer, crank the tunes, and get to work!
Again, I’m trying to piece together how my husband smokes his venison sausage. So, if you have any questions, please post them in the comments below, and I’ll get the answers for you.
Enjoy your smoked venison sausage!
Sausage Smoking Tips for Venison Brats
When smoking venison brats, achieving the perfect balance of smoke flavor and tenderness is key. Here are some tips to help you master the process:
- Preheat Your Smoker: Ensure your smoker reaches the desired temperature before placing the brats inside. A steady temperature is crucial for even cooking.
- Don’t Overcrowd: Place the brats on the smoker racks with enough space between them to ensure the smoke can circulate freely around each piece. This helps in achieving an even smoke flavor.
- Monitor the Temperature: Use a reliable meat thermometer to monitor the internal temperature of your brats. You’re aiming for an internal temperature of 160ºF to ensure they are cooked safely, without becoming dry.
- Mild Wood Chips for Flavor: Opt for woods like apple, cherry, or hickory to give your venison brats a subtle, smoky flavor without overpowering the natural taste of the venison.
- Keep the Lid Closed: Resist the temptation to frequently check your brats by opening the smoker. Every time the lid is opened, heat and smoke escape, which can extend the cooking time and affect the smokiness.
- Rest Before Serving: Allow the brats to rest for a few minutes after smoking. This rest period lets the juices redistribute throughout the sausage, making it more tender and flavorful when you cut into it.
Remember, smoking is as much an art as it is a science. Don’t be afraid to experiment with smoking times and wood types until you find the perfect combination that suits your taste.
Enjoy the process and the delicious results of smoking your own venison brats!
FAQs
If you’re scratching your head wondering about some parts of the process, don’t worry. Here are some FAQs that’ll clear up the fog and maybe even add a little extra spice to your smoking saga.
What is the best venison to pork ratio for sausage?
The ideal venison to pork ratio for making sausage is generally 1:1. This means for every one part of venison, you should add one part of pork.
The pork not only adds fat, which is crucial for a juicy sausage, but also compliments the flavor of the venison. This ratio can be adjusted based on personal preference for a leaner or fattier sausage.
Why do you add pork to venison sausage recipes?
Adding pork to venison sausage recipes primarily serves two purposes: it introduces fat into the mixture, which venison lacks, ensuring the sausage remains moist and flavorful during the cooking process.
And pork’s mild taste blends well with the robust flavor of venison, balancing the overall flavor profile and making the sausage more palatable.
How do you keep deer sausage from drying out?
To keep deer sausage from drying out, ensure it contains a sufficient amount of fat—adding pork fat is a common method. Also, be mindful of your cooking temperature; low and slow is the key.
Avoid overcooking by using a meat thermometer to ensure it reaches the safe internal temperature without exceeding it.
Also, add moisture during the smoking or cooking process, such as through a water pan, to help maintain humidity and prevent drying.
Do you have to cure deer sausage?
Curing deer sausage is not strictly necessary, especially if you plan to freeze it immediately and cook it thoroughly before consumption.
However, curing is recommended if you intend to smoke the sausage at lower temperatures, as it helps prevent the growth of bacteria. Curing can also enhance the sausage’s flavor and preserve its color, making it a valuable step for those looking to achieve a specific taste and aesthetic.
Get Started on Your Venison Sausage Making Journey!
Don’t wait any longer to start making your own delicious venison sausage at home. To help you begin, here’s a list of supplies you’ll need to purchase:
- Sausage Stuffer: Essential for getting your sausage mix into casings smoothly and efficiently.
- Grinder: A good quality grinder will help you grind the venison and pork fat to your desired consistency.
- Smoker: For those who prefer their sausage smoked, a reliable smoker is key to achieving that perfect flavor.
- Casings: Choose from natural or synthetic casings based on your preference to encase your sausage.
- Sausage Making Kit: Great for beginners, these kits often include seasoning mixes and other tools to help you get started.
- Vacuum Sealer: Ideal for storing your sausage before cooking or freezing, it ensures that your hard work remains delicious and free from freezer burn.
Gather your supplies and get ready to explore the art of sausage making!
At the End of the Day…

At the end of the day, creating the perfect venison sausage is an art that balances flavor, moisture, and safety. Whether you’re blending pork for juiciness, carefully managing your cooking temperature to prevent drying, or opting to cure your sausage for that extra layer of flavor and safety, each step contributes to the final delight.
The key lies in understanding these principles, experimenting with personal preferences, and enjoying the rich, fulfilling tastes that game meat has to offer.
Remember, the ultimate goal is to craft a sausage that not only tastes great but also pays homage to the traditional practices of hunting and sausage-making, ensuring every bite is a celebration of nature’s bounty!
Meet the Cook

Meet my husband, Scott! He is the go-to cook in our family.
Our favorites: ANYTHING he grills (although his grilled potatoes and veggies are to-die-for) and his HuHot.
Scott is the proud father of six mischievous boys. He is a certified welder, mechanic, and pipe fitter. I guess you could say he’s the jack of all trades!
But when he’s not maintaining the Ag department, you can find him maintaining his home! (Because something is always broken….)
His hobbies include hunting, fishing, woodworking, and snowmobiling, but his all-time favorite is just hanging out with his wife, his boys, and his German Shepherd.
More Venison Recipes

Homemade Smoked Venison Sausage
Equipment
- 1 smoker My husband likes Pit Boss
- 1 meat grinder
- 1 sausage stuffer My husband likes Lem
- 1 venison sausage kit My husband likes the Polish Sausage Kit from Hi Mountain
- 1 sausage casings
Ingredients
- 1 Part Venison It doesn't matter how much venison and sausage you use, as long as it is a 1-to-1 ratio.
- 1 Part Pork Sausage
- 1 Can Beer Optional
Instructions
- Rinse excess blood off of your meat.
- Rinse the casings under cold water to remove the salt from them.
- Soak your casings in warm water for about one hour, while you grind the meat.
- After your meat has drained, grind it using the meat grinder.
- Mix the ground pork with the ground venison by hand. You should have equal parts venison and ground pork.
- Prepare your venison sausage seasoning by following the kit directions.
- Pour the seasoning over the meat mixture and work the seasoning in by hand.
- Run the seasoned meat mixture through the meat grinder again.
- If you'd like, mix one can of beer into the meat mixture.
- Load up your stuffer with the meat mixture, and run it through to the tip of the stuffer tube.
- Gently ease the casing onto the stuffer.
- Tie the end of the casing.
- Gently push the meat mixture through the stuffer and into the casing, using your hands to mold the casing as you go.
- As you near the end of the casing, slow down, remove the casing, and tie a knot.
- Continue until all of your casings are stuffed, or you run out of meat mixture.
- Let your meat rest overnight.
- In the morning, load up your smoker with the sausage.
- Smoke at 120 degrees for 1 hour, 160 degrees for 30 minutes, with the smoke "on", and 180 degrees until the suasage reaches an internal temperature of 156 degrees F. Leave the smoke on for up to 2 hours.
- If you'd like, freeze your sausage in freezer bags or vacuum sealed bags.


